Print the Future
Adventures in 3D Printing
Does your heater bed plate turn off your PSU
Apparently, the only way for a Prusa’s (at least Makergear’s Prusa) HBP to not shut off the PSU is to place a load that draws at least .5 amps on the PSU’s 5v rail. So I just used a little halogen lamp:

Which might have been overkill, but it works. Anyway I just shoved it into one of the IDE connectors 5v and now my PSU doesn’t shut off when I turn on the bed plate!

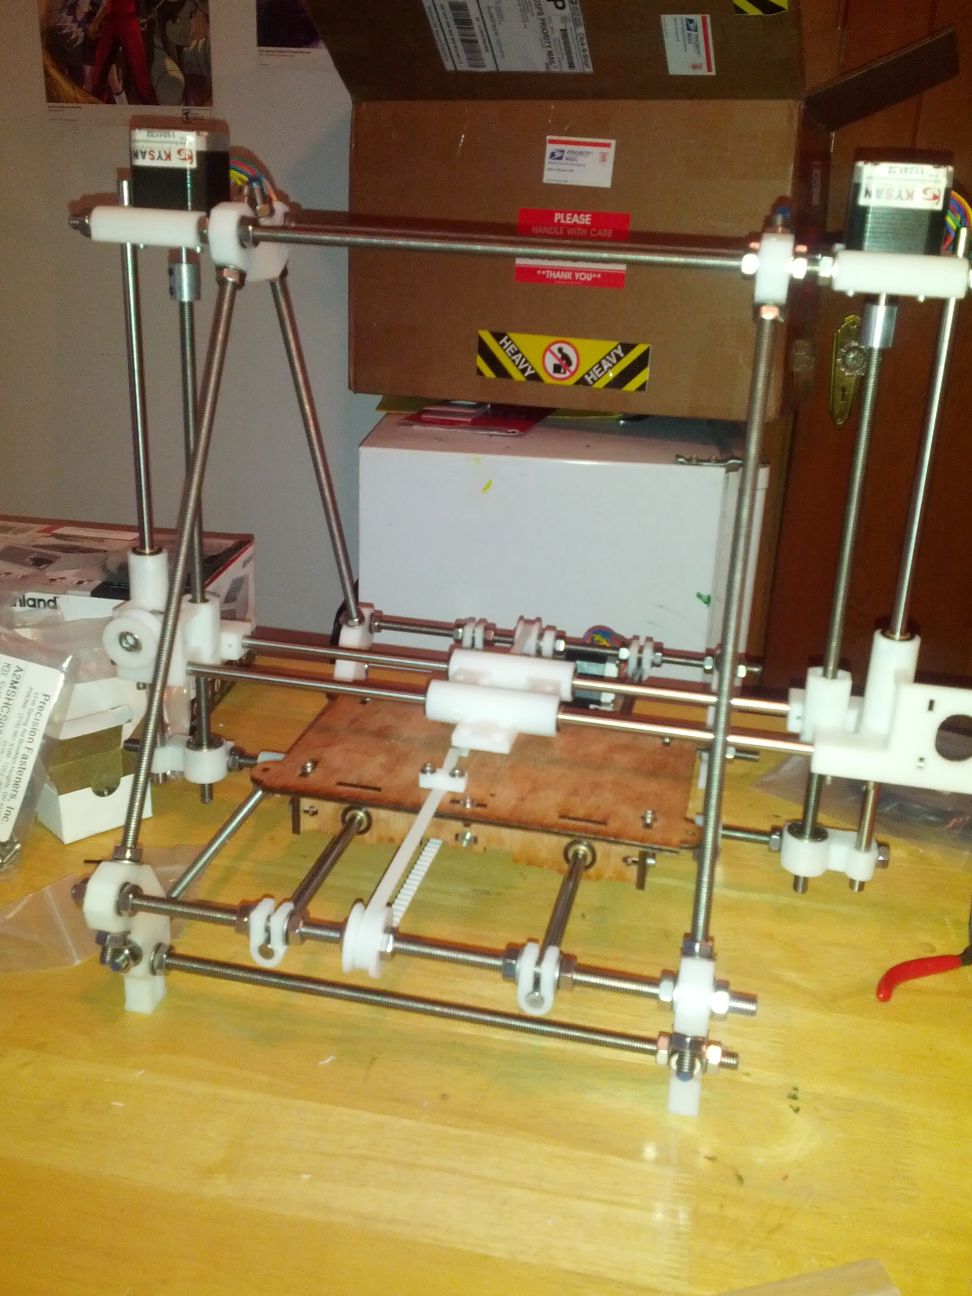
Various assembly photos!
Here are some random photos I took during the assembly! Sure they may be worthless now, but I was originally planning to post a whole chronicle of the assembly. Ya that never happened.


First(ish) print
Ya okay I skipped a few days, but here’s a cool butterfly I printed from http://www.thingiverse.com/thing:20155

Ya it looks a bit crappy I admit, but hopefully my prints will get better not worse! I’m currently working on printing parts for the Mendel itself, including the Birdstruder http://www.thingiverse.com/thing:13628 and a fan support http://www.thingiverse.com/thing:10988
Prusa Mendal kit finally arrives!
And I’ve been too busy assembling to post! Here it is nearly fully assembled:

Netapp is way easier
After making a long pointless post about fixing STL files the other day, I’ve just found http://cloud.netfabb.com which fixes STL files online in a few seconds for you…
Also I’ve been looking through the pictures on The Art of 3D Print Failure, a great Flickr group with examples of bad prints and what went wrong with them.
Using 3dc to make an STL behave properly in RepRap
Unfortunately there seems to be a parsing bug in Java’s STL parsing script. This causes some STL’s to not display properly. This is what an STL model of a Hydralisk looked like when I first loaded it into the RepRap software:

This bug is very briefly outlined on the RepRap wiki here, with a link to 3dc, a piece of software developed by Alex W. Which you can download here. (I have the fully compiled binary hosted here, compiled on Ubuntu 11.10 g++ 4.6.1) Unfortunately for me, I’m running Windows 7. However, I just happen to have VMWare Workstation and an Ubuntu install iso! If you don’t have VMWare, you can use Oracle’s free VirtualBox, and the process is pretty much identical. So here’s what I did to get this model working:
Booted up VMWare and installed an instance of Ubuntu 11.10. This is a really simple process, however if you need help here’s a good write up on how to do it from howtogeek.com.
Tried to figure out the crazy new Unity interface. All I needed was a terminal, so all I had to do is click on the top icon (Dash) and do a search for Terminal:

After that, you have to install the Boost C++ libraries. This is pretty easy to do, just type in the command:
sudo apt-get install libboost-dev
When prompted, just press enter and Ubuntu should reach out and grab the latest Boost library and install it for you.
Now here’s a tricky part that took me a second to figure out. You also have to install g++ to compile 3dc. If you don’t, you will get an error about it not being found (Not really that tricky I guess). However it’s as easy as Boost to get, just issue the command:
sudo apt-get install g++
That’s it, you should be ready to compile.
With that done, it’s time to get the 3dc source files onto your virtual machine. This can be done many ways, however the easiest way will probably be to open up Firefox in Ubuntu and grab it from GitHub here: https://github.com/malexw/3dc
Once it’s on your box, cd to it and just type
make
and hit enter.
Hopefully it compiled with no errors. If it did, you should now have a ‘bin’ directory in your 3dc directory. If it didn’t leave a message and we can figure out why. Inside that you will find a binary with the name ‘3dc’. This is what you will use to fix your STL file.
Now you have to get your STL file to your virtual box. The way I did it was to share a folder on my Windows 7 computer with all my STL files in it. That way, I could open a file explorer window in Ubuntu, and browse to it under ‘Network’. There a million other ways to share files between a virtual box and your main computer, but I find this the easiest. I always have trouble with the VMWare tools and really never bothered trying to get them working.
Anyway, if you need help sharing a folder in Windows 7, here’s a through explaination from Microsoft: http://windows.microsoft.com/en-US/windows7/Share-files-with-someone. Basically, just make a folder, right click it and go to sharing. Then click on share and you’ll get a dialog box asking who you want to share it with. I just put ‘Everyone’ in the box and click add (no one else is really on my network anyway). Make the permissions for ‘Everyone’ Read/Write. Also, so that I don’t have to log in to access the folder from Ubuntu, I just click the link at the bottom to the Network and Sharing Center, click on Home or Work, scroll down to Password protected sharing and click on Turn off password protected sharing. It just makes it easier.
To access the shared folder on Ubuntu, just click on the Home button to the left (second from the top), then click on Browse Network at the bottom. You should see your PC listed there, and you can just navigate to your shared folder.
From there copy your STL file to the bin directory 3dc created for you. I stuck it in my home directory, so it was at ~/3dc/bin.
Once your STL is in the same directory as your 3dc binary, issue the command to fix it. The format is
./3dc input_type input_file output_type output_file
So this is what I typed in to convert it:
./3dc stl Hydralisk.stl stld Hydralisk_fixed.stl
Now, all I did was move the Hydralisk_fixed.stl back to the shared folder on my Windows machine. Opening it up in RepRap, here’s what it looks like now:

By the way, this is the Hydralisk model by blueteak. If you would like the complied 3dc, here it is hosted on sendspace: http://www.sendspace.com/file/oklx3j. Please keep in mind this is entirely the work on Alex W from http://www.kwartzlab.ca. His website is http://www.blinkenlights.ca/.
Getting the RepRap software to run
One of the first things I did (after reading the Prusa setup guide 3 times) was to download the RepRap software. Following the guide on the wiki was easy enough, however using Java 7 I did have to add the java /bin directory to my PATH variable. It’s easy enough, and there’s even a link on the wiki to an Oracle article about it (a little convoluted though). However, here’s how I did it (on Windows 7):
Right click Computer, goto Properties
Click ‘Advanced System Settings’
Click ‘Enviroment Variables…’

In the System variable box, click the ‘Path’ variable
Make sure the cursor is at the very end of the line of text in the Variable value box OR copy and paste the box’s entire content into a text document.
Add your /bin path to the end of the list, making to sure to add a semi-colon (;) BEFORE

A trick to quickly getting to the bin directory would be to just search for java in the start bar, then right click the java executable that appears and going to ‘open file location’. That’s your /bin directory!
With Java 7 installed, this is what my path to /bin was:
C:\Program Files (x86)\Java\jre7\bin
so at the end of the PATH value I just added ;C:\Program Files (x86)\Java\jre7\bin
Pretty simple but maybe that will help someone out some day?
The purpose of this blog
My name is liam, and I’m going to be keeping this blog as a chronicle of my adventures in 3D printing. Considering my minimal experience in the field, I will be trying to post mostly about the road blocks I encounter, and how I overcame them. As such, I hope to help others who may be starting on the same path I am.
I’m actually still waiting on my MakerGear Prusa kit, which should hopefully come in a few weeks. Until then, I am learning the various software I’ll be using such as Slic3r and RepRap.
